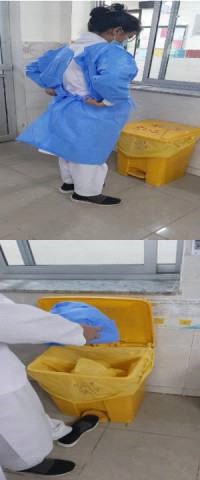
INFECTION PREVENTION & CONTROL GUIDELINES guidelines
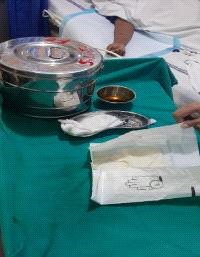
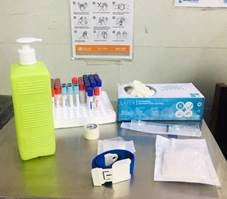
1. Assemble equipment and include needle and syringe or vacuum tube, depending on
which is to be used. 
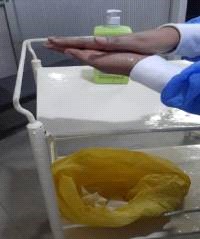
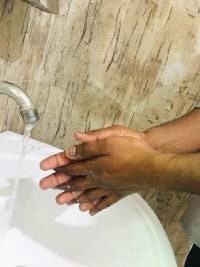
2. Perform hand hygiene (if using soap and water, dry hands with single use towel.
3. Identify and prepare the patient.
4. Select the site, preferably at the antecubital area (i.e. the bend of the elbow).
Warming the arm with a hot pack, or hanging the hand down may make it easier to
see
the veins. Palpate the area to locate the anatomic landmarks.
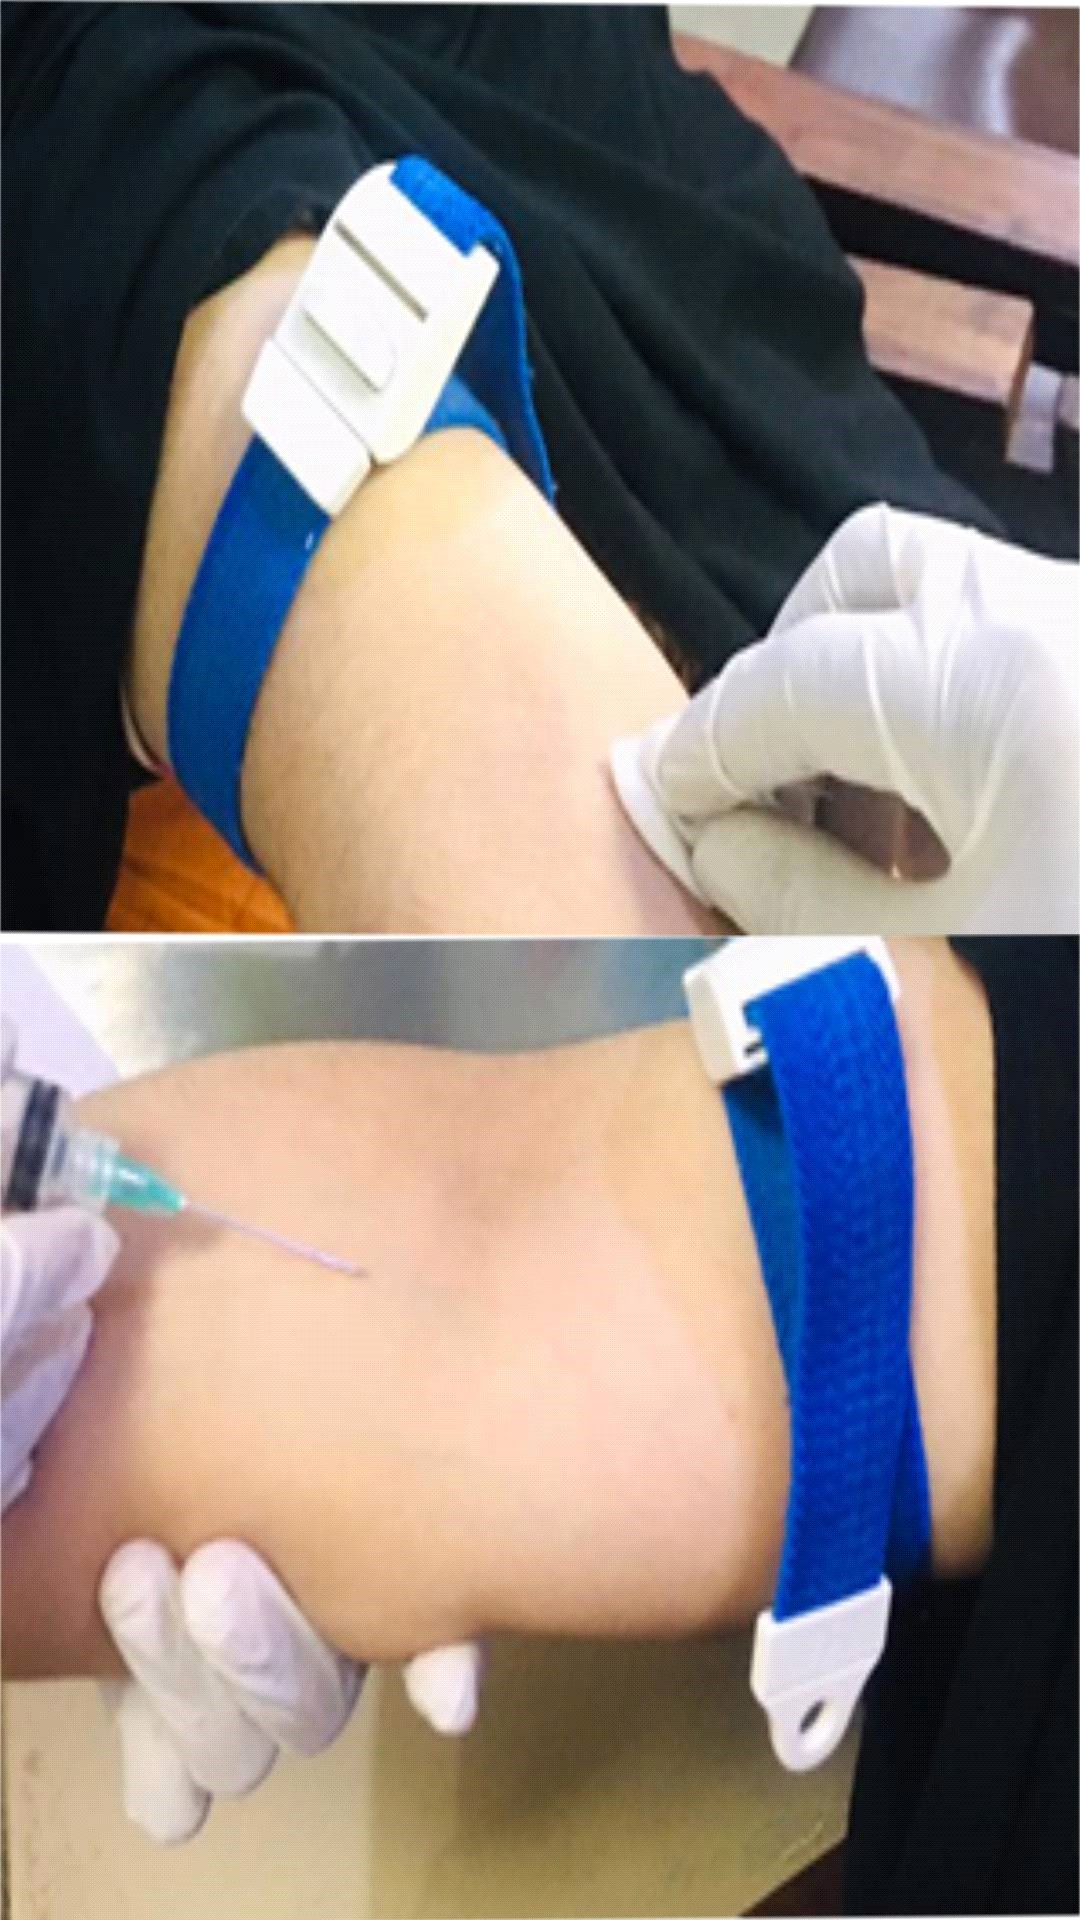
5. Apply a tourniquet, about 4–5 finger widths above the selected venipuncture
site.
6. Ask the patient to form a fist so that the veins are more prominent.
7. Put on well-fitting, non-sterile gloves.

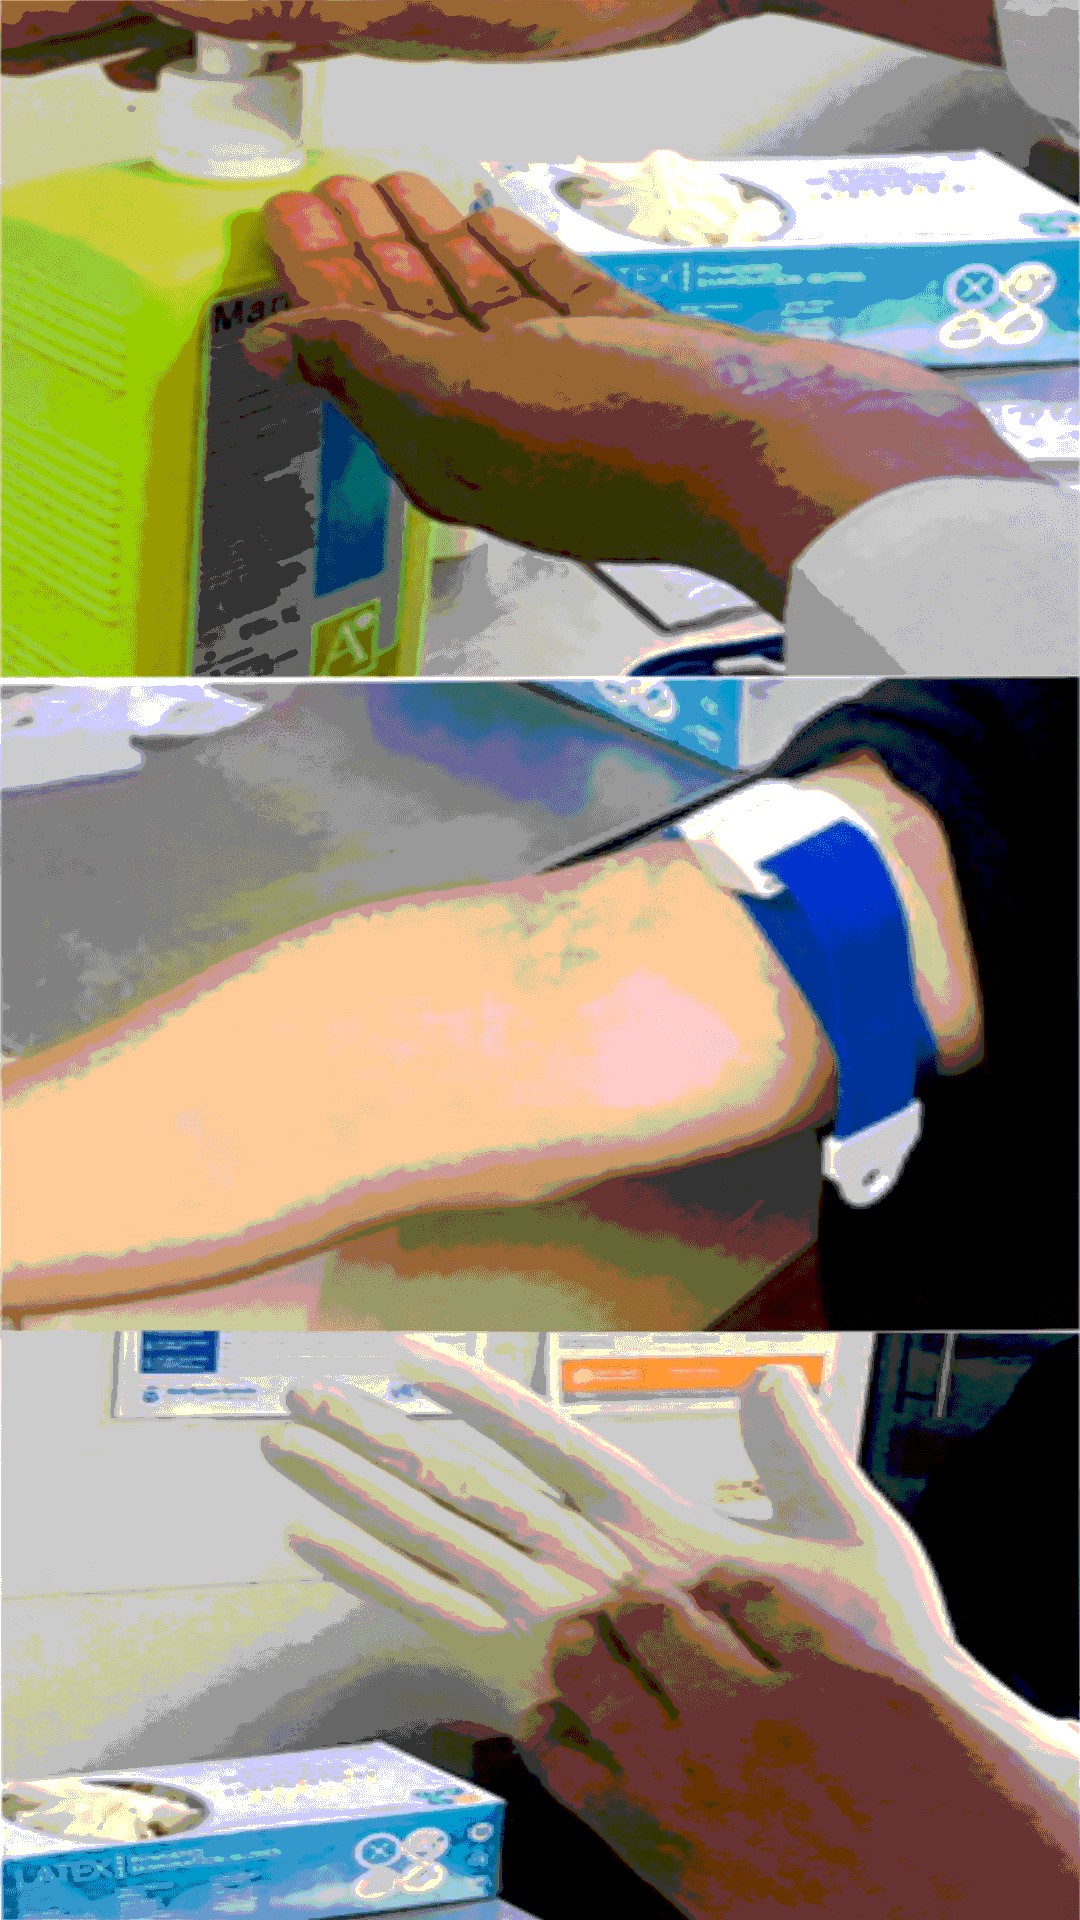
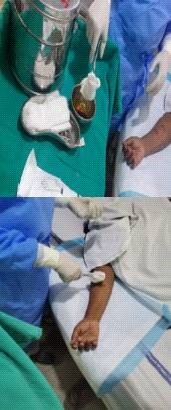
8. Disinfect the site using 70% isopropyl alcohol for 30 seconds with friction in a
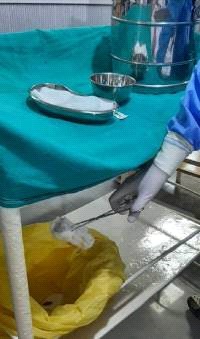
back and forth direction.
9. Allow to dry completely (30 seconds).DO NOT touch the site once alcohol or other
antiseptic has been applied. If further vein palpation is necessary after skin
preparation, a sterile glove should be worn.
10. Anchor the vein by holding the patient’s arm and placing a thumb BELOW
the venipuncture site.
11. Enter the vein swiftly at a 30 degree angle.
12. Once sufficient blood has been collected, release the tourniquet BEFORE
withdrawing the needle.
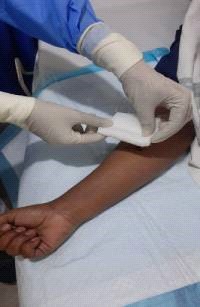
13. Withdraw the needle gently and then give the patient a clean gauze or dry
cotton-wool ball to apply to the site with gentle pressure.

14. Discard the used needle and syringe or blood-sampling device into a puncture-resistant
container.
15. Check the label and forms for accuracy.
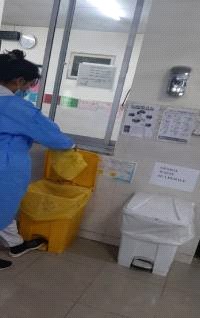
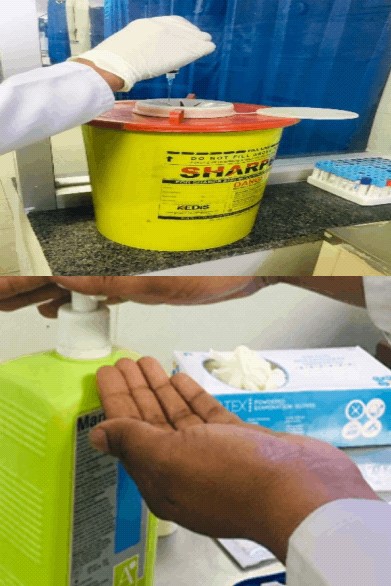
16. Discard sharps and broken glass into the sharps container. Place items that can drip
blood or body fluids into the infectious waste.
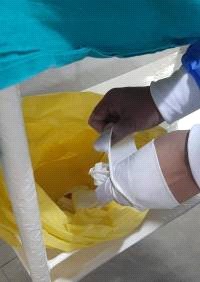
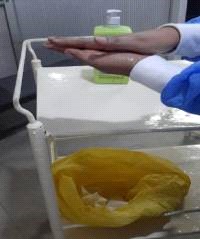
17. Remove gloves, discard properly and perform hand hygiene. If using soap and
water, dry hands with single-use towels.

1. Assemble equipment and include needle and syringe or vacuum tube, depending on which is to be used.


2. Perform hand hygiene (if using soap and water, dry hands with single use towel.
3. Identify and prepare the patient.
4. Select the site, preferably at the antecubital area (i.e. the bend of the elbow). Warming the arm with a hot pack, or hanging the hand down may make it easier to
see the veins. Palpate the area to locate the anatomic landmarks.
5. Apply a tourniquet, about 4–5 finger widths above the selected venipuncture site.
6. Ask the patient to form a fist so that the veins are more prominent.
7. Put on well-fitting, non-sterile gloves.


8. Disinfect the site using 70% isopropyl alcohol for 30 seconds with friction in a back and forth direction.
9. Allow to dry completely (30 seconds).DO NOT touch the site once alcohol or other antiseptic has been applied. If further vein palpation is necessary after skin
preparation, a sterile glove should be worn.
10. Anchor the vein by holding the patient’s arm and placing a thumb BELOW the venipuncture site.
11. Enter the vein swiftly at a 30 degree angle.
12. Once sufficient blood has been collected, release the tourniquet BEFORE withdrawing the needle.
13. Withdraw the needle gently and then give the patient a clean gauze or dry cotton-wool ball to apply to the site with gentle pressure.


14. Discard the used needle and syringe or blood-sampling device into a puncture-resistant container.
15. Check the label and forms for accuracy.
16. Discard sharps and broken glass into the sharps container. Place items that can drip blood or body fluids into the infectious waste.
17. Remove gloves, discard properly and perform hand hygiene. If using soap and water, dry hands with single-use towels.


Blood culture
1. Blood cultures should be performed for patients with a reasonable likelihood of
bacteremia.
2. Make every effort to obtain blood culture sample before initiation of antimicrobial
therapy.
3. Preferred venipuncture sites include the antecubital veins or other upper extremity blood
vessels; these sites are less likely to be associated with blood culture
contamination
than femoral vessels.
4. Blood cultures should not be obtained via intravascular catheters unless the catheter is
thought to be the source of bacteremia.
5. Draw blood sample aspectically. Use of an alcohal cantaining disinfetctant is
recommended.Using strile gloves is advisable.
1. Assemble equipment and include needle and syringe or vacuum tube, depending
on which is to be used. 

2. Perform hand hygiene (if using soap and water, dry hands with single use
towel.
3. Identify and prepare the patient.
4. Select the site, preferably at the antecubital area (i.e. the bend of the
elbow). Warming the arm with a hot pack, or hanging the hand down may make it easier
to
see the veins. Palpate the area to locate the anatomic landmarks.
5. Apply a tourniquet, about 4–5 finger widths above the selected
venipuncture site.
6. Ask the patient to form a fist so that the veins are more prominent.
7. Put on well-fitting, non-sterile gloves.


8. Disinfect the site using 70% isopropyl alcohol for 30 seconds with friction
in a back and forth direction.
9. Allow to dry completely (30 seconds).DO NOT touch the site once alcohol or
other antiseptic has been applied. If further vein palpation is necessary after
skin
preparation, a sterile glove should be worn.
10. Anchor the vein by holding the patient’s arm and placing a thumb
BELOW the venipuncture site.
11. Enter the vein swiftly at a 30 degree angle.
12. Once sufficient blood has been collected, release the tourniquet
BEFORE withdrawing the needle.
13. Withdraw the needle gently and then give the patient a clean gauze
or dry cotton-wool ball to apply to the site with gentle pressure.


6. Blood should be inoculated directly into blood culture bottles(needle needs not to be
changed before inserting blood into culture bottle).
7. Tops of blood culture vails should be disinfected prior to inoculation of blood
with 70% alcohol swab.
8. Collect required amount of blood.
1. Assemble equipment and include needle and syringe or vacuum tube, depending
on which is to be used. 

2. Perform hand hygiene (if using soap and water, dry hands with single use
towel.
3. Identify and prepare the patient.
4. Select the site, preferably at the antecubital area (i.e. the bend of the
elbow). Warming the arm with a hot pack, or hanging the hand down may make it easier
to
see the veins. Palpate the area to locate the anatomic landmarks.
5. Apply a tourniquet, about 4–5 finger widths above the selected
venipuncture site.
6. Ask the patient to form a fist so that the veins are more prominent.
7. Put on well-fitting, non-sterile gloves.


8. Disinfect the site using 70% isopropyl alcohol for 30 seconds with friction
in a back and forth direction.
9. Allow to dry completely (30 seconds).DO NOT touch the site once alcohol or
other antiseptic has been applied. If further vein palpation is necessary after
skin
preparation, a sterile glove should be worn.
10. Anchor the vein by holding the patient’s arm and placing a thumb
BELOW the venipuncture site.
11. Enter the vein swiftly at a 30 degree angle.
12. Once sufficient blood has been collected, release the tourniquet
BEFORE withdrawing the needle.
13. Withdraw the needle gently and then give the patient a clean gauze
or dry cotton-wool ball to apply to the site with gentle pressure.


1. Assemble equipment and include needle and syringe or vacuum tube, depending on which is to be used.


2. Perform hand hygiene (if using soap and water, dry hands with single use towel.
3. Identify and prepare the patient.
4. Select the site, preferably at the antecubital area (i.e. the bend of the elbow). Warming the arm with a hot pack, or hanging the hand down may make it easier to
see the veins. Palpate the area to locate the anatomic landmarks.
5. Apply a tourniquet, about 4–5 finger widths above the selected venipuncture site.
6. Ask the patient to form a fist so that the veins are more prominent.
7. Put on well-fitting, non-sterile gloves.


8. Disinfect the site using 70% isopropyl alcohol for 30 seconds with friction in a back and forth direction.
9. Allow to dry completely (30 seconds).DO NOT touch the site once alcohol or other antiseptic has been applied. If further vein palpation is necessary after skin
preparation, a sterile glove should be worn.
10. Anchor the vein by holding the patient’s arm and placing a thumb BELOW the venipuncture site.
11. Enter the vein swiftly at a 30 degree angle.
12. Once sufficient blood has been collected, release the tourniquet BEFORE withdrawing the needle.
13. Withdraw the needle gently and then give the patient a clean gauze or dry cotton-wool ball to apply to the site with gentle pressure.


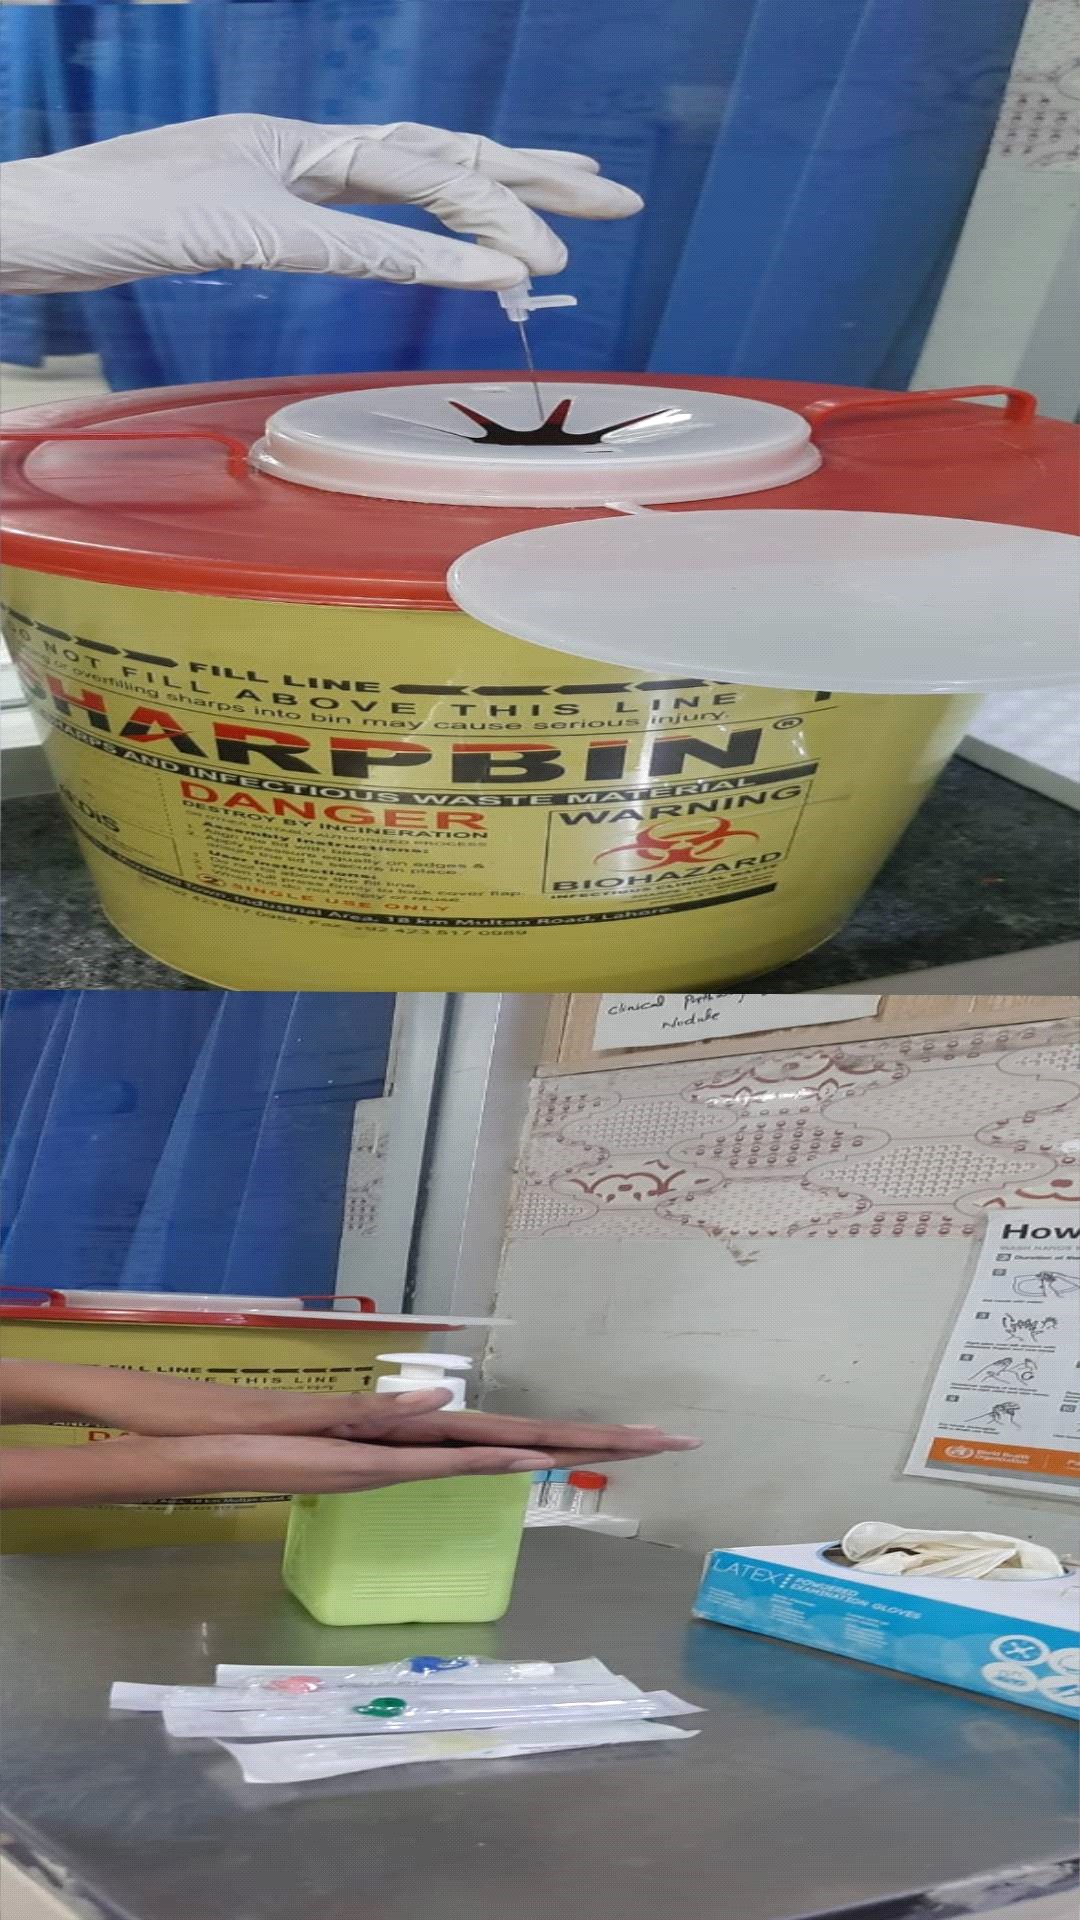
IV Catheter / Cannula Insertion
Assemble equipment (tourniquet, gloves, alcohol swabs, Cannula, 3 way extension,
syringes, sharp box). 

1. Perform hand hygiene (if using soap and water, dry hands with single use towel).
2. Identify and prepare the patient.
3. Select the site.
4. Apply a tourniquet, about 4–5 finger widths above the selected venepuncture
site.
5. Ask the patient to form a fist so that the veins are more prominent.
6. Perfrom hand hygiene. Put on well-fitting, non-sterile gloves.

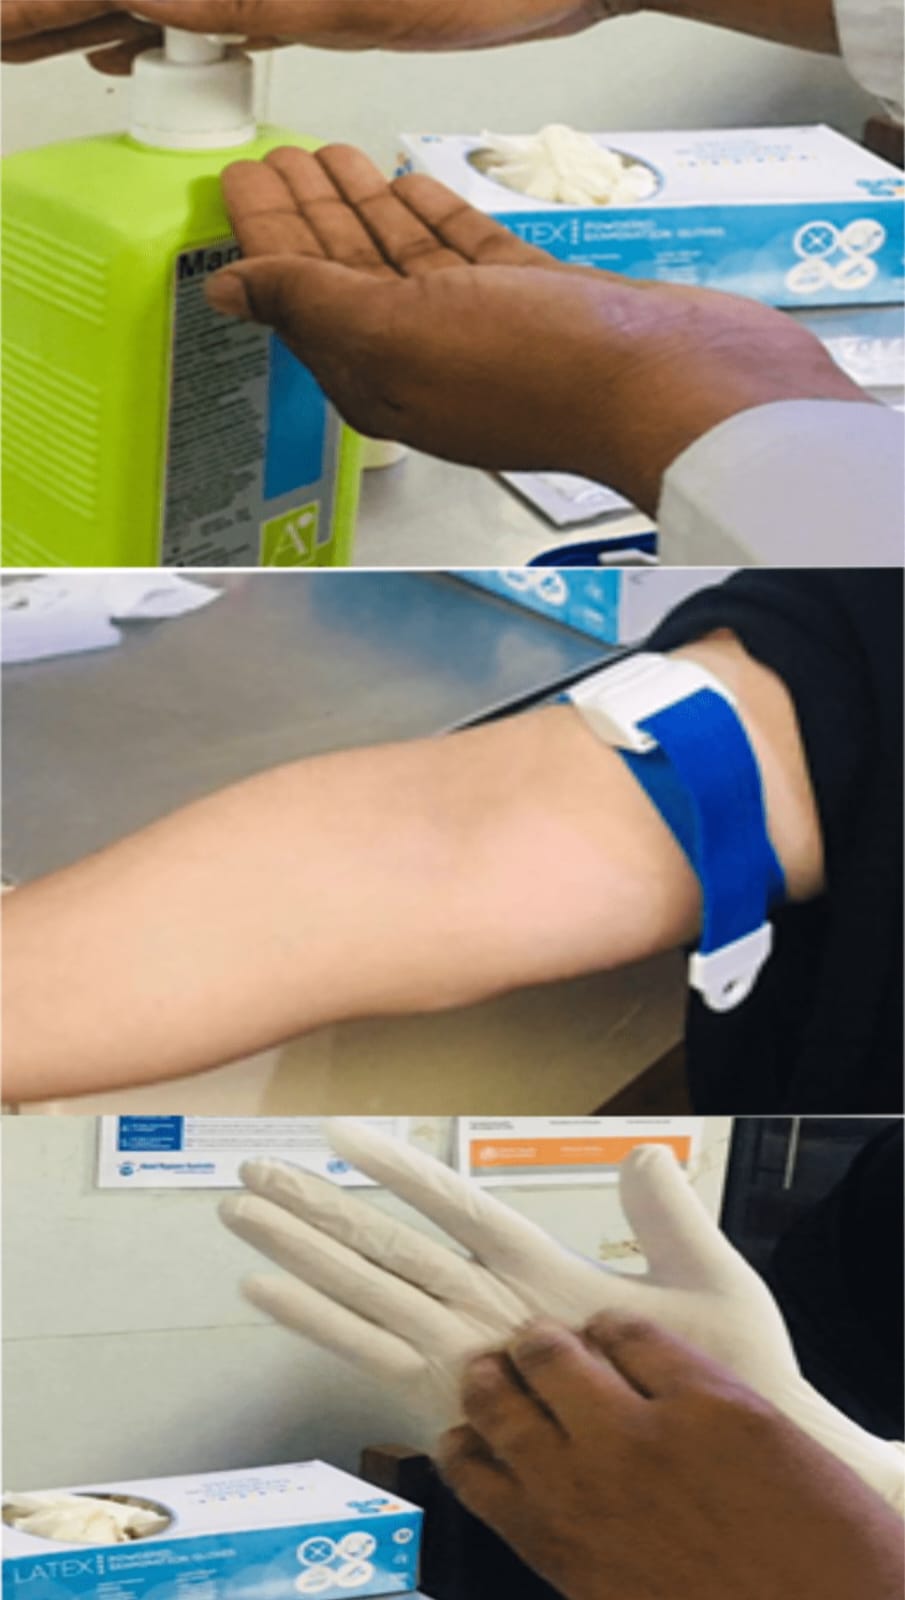
7. Disinfect the site using 70% isopropyl alcohol for 30 seconds with friction in a back and
forth direction.
8. Allow to dry completely (30 seconds). DONOT touch the puncture site after applying
antiseptic.
9. Anchor the vein by holding the patient’s arm/hand and placing a thumb BELOW the
venepuncture site.
10. Enter the IV catheter swiftly at a 30 degree angle.
11. Once sufficient blood has been seen coming in the catheter, release the
tourniquet.
12. Withdraw the needle gently and then secure the catheter with a transparent/ gauze
dressing

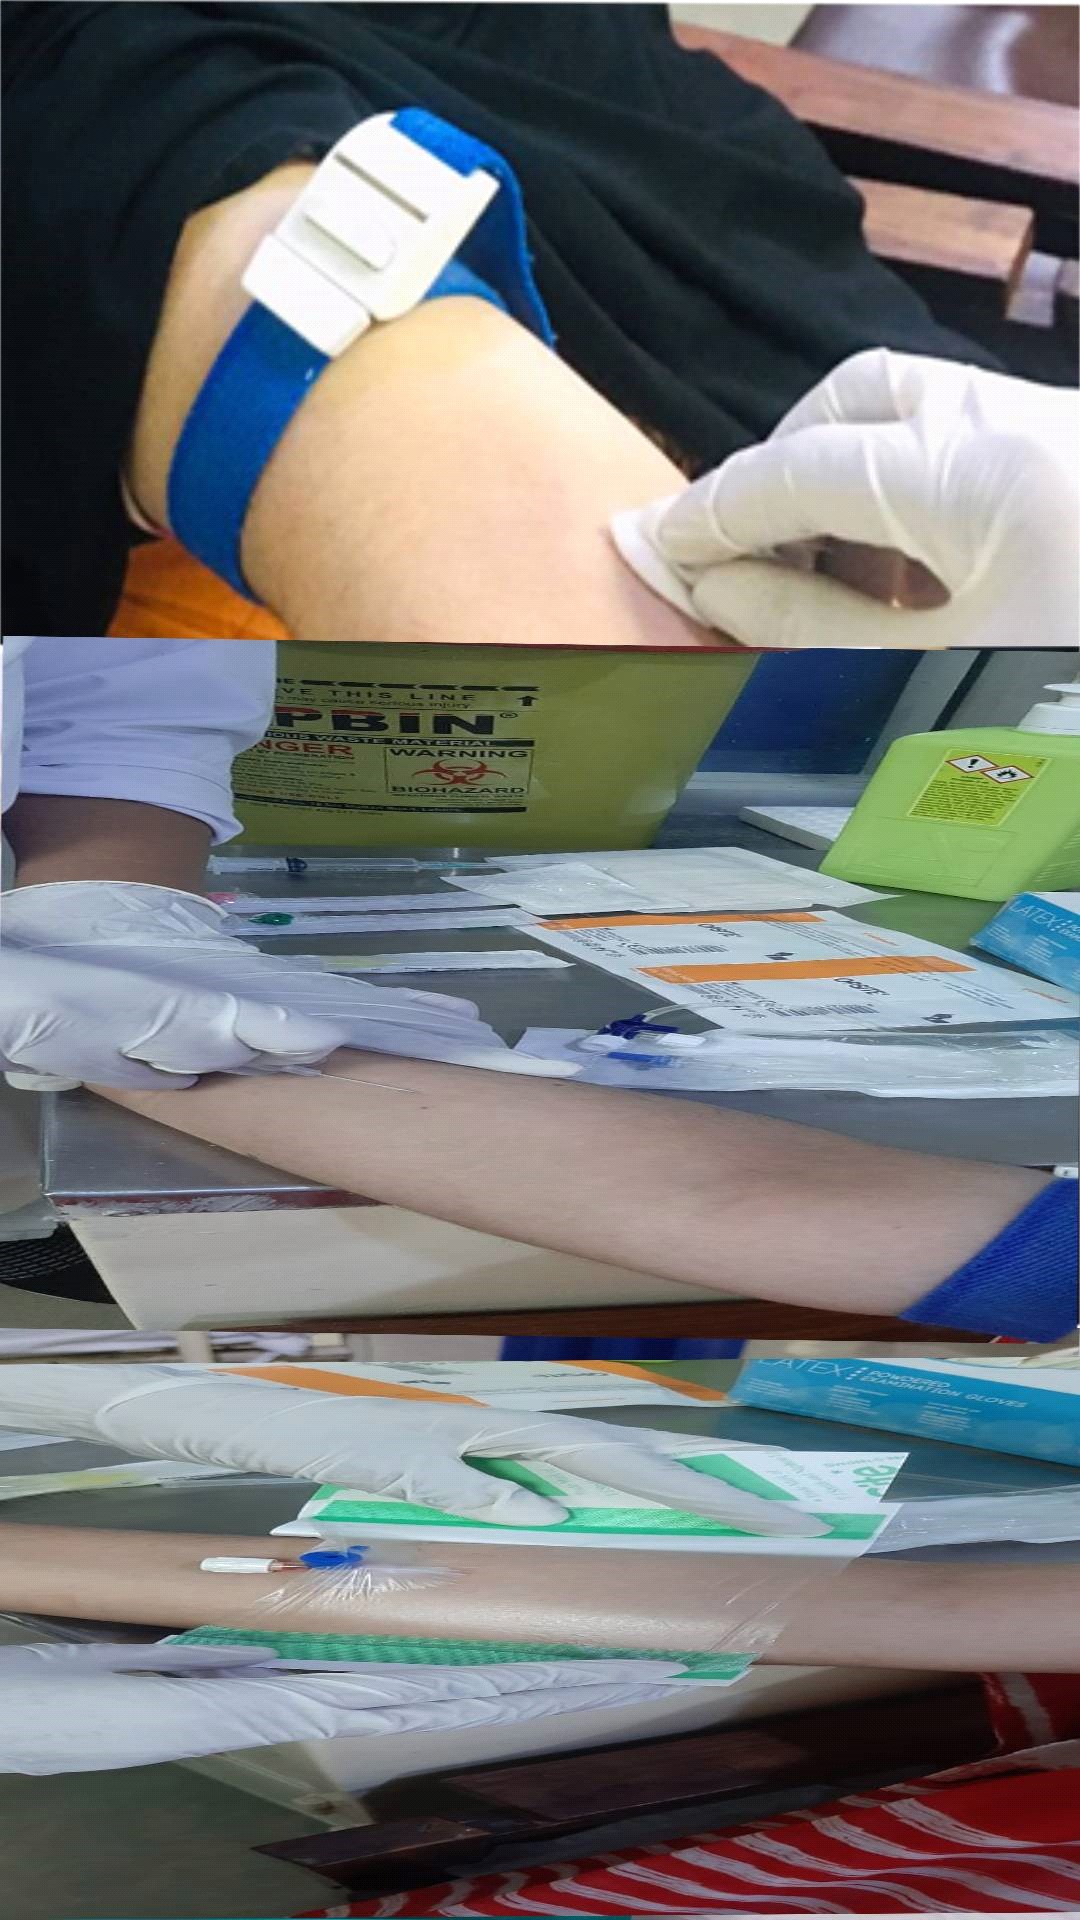
13. Discard the used needle into a puncture-resistant container.
14. Remove gloves, discard properly and perform hand hygiene. If using soap and water, dry
hands with single-use towels.
15. Enter the record with date.

IV Catheter/Cannula Care
1. In adults, use an upper-extremity site for catheter insertion. Replace a catheter inserted
in a lower extremity site to an upper extremity site as soon as possible.
2. In pediatric patients, the upper or lower extremities or the scalp (in neonates or young
infants) can be used as the catheter insertion site.
3. Replace peripheral catheters after 72-96 hours.
4. Use a midline catheter or peripherally inserted central catheter (PICC), instead of a short
peripheral catheter, when the duration of IV therapy will likely exceed six
days.
5. Any dressing that becomes soiled, wet, damaged, is no longer adherent, has visible
ooze under it or starts to lift should be changed immediately.
6. Evaluate the catheter insertion site daily by palpation through the dressing to
discern tenderness and by inspection if a transparent dressing is in use. Gauze and
opaque dressings should not be removed if the patient has no clinical signs of
infection.
If the patient has local tenderness or other signs of possible infection ,
opaque dressing should be removed to visualize clearly.
7. Topical antibiotic ointments or creams should not be routinely used on insertion
sites.
Urinary Catheter Insertion
1.Confirm patient meets the appropriate indications for Indwelling Urethral Catheter.
2.Gather the equipment.

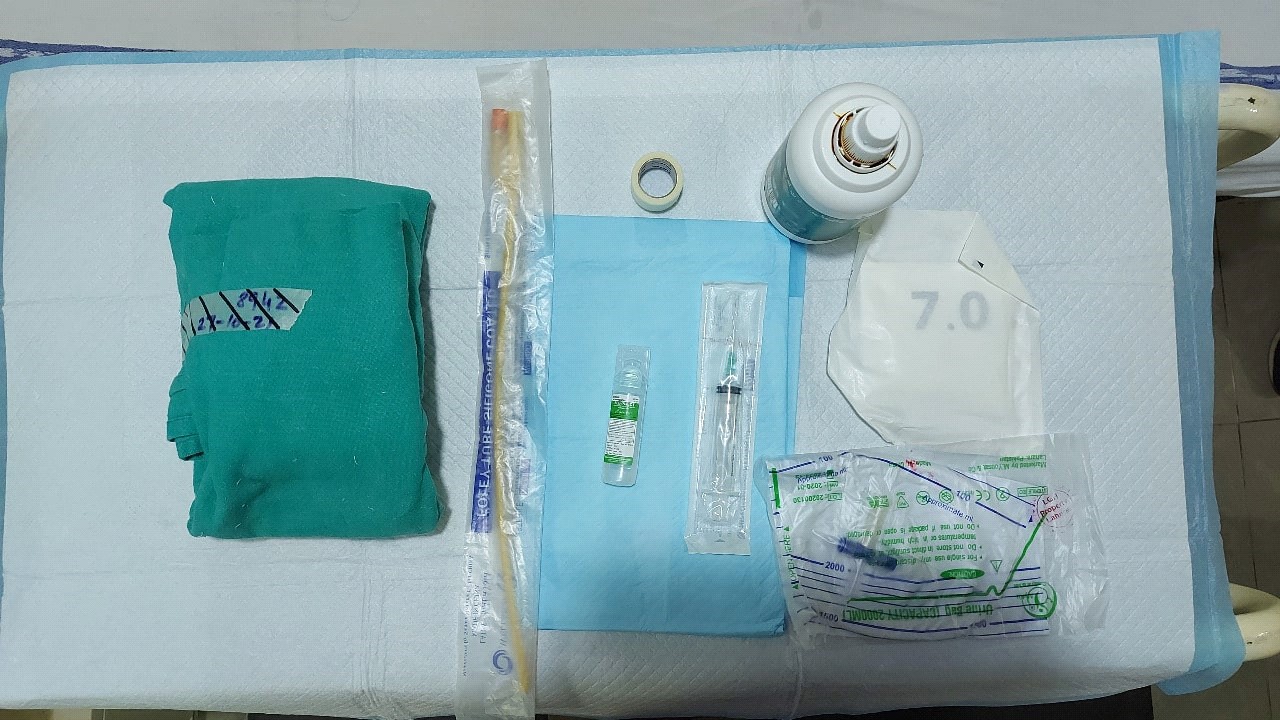
3. Perform hand hygiene.
4. Position the patient properly.
4a. Female
Supine position with knees flexed and separated; feet flat on the bed.
4b. Male
Supine position with legs extended.
5. Open the package and create an area for the sterile field.
6. Drape the patient with sterile sheets supplied in the kit.
7. Perform hand hygiene and wear sterile gloves.
8. Cleanse the perineal area with pyodine solution.
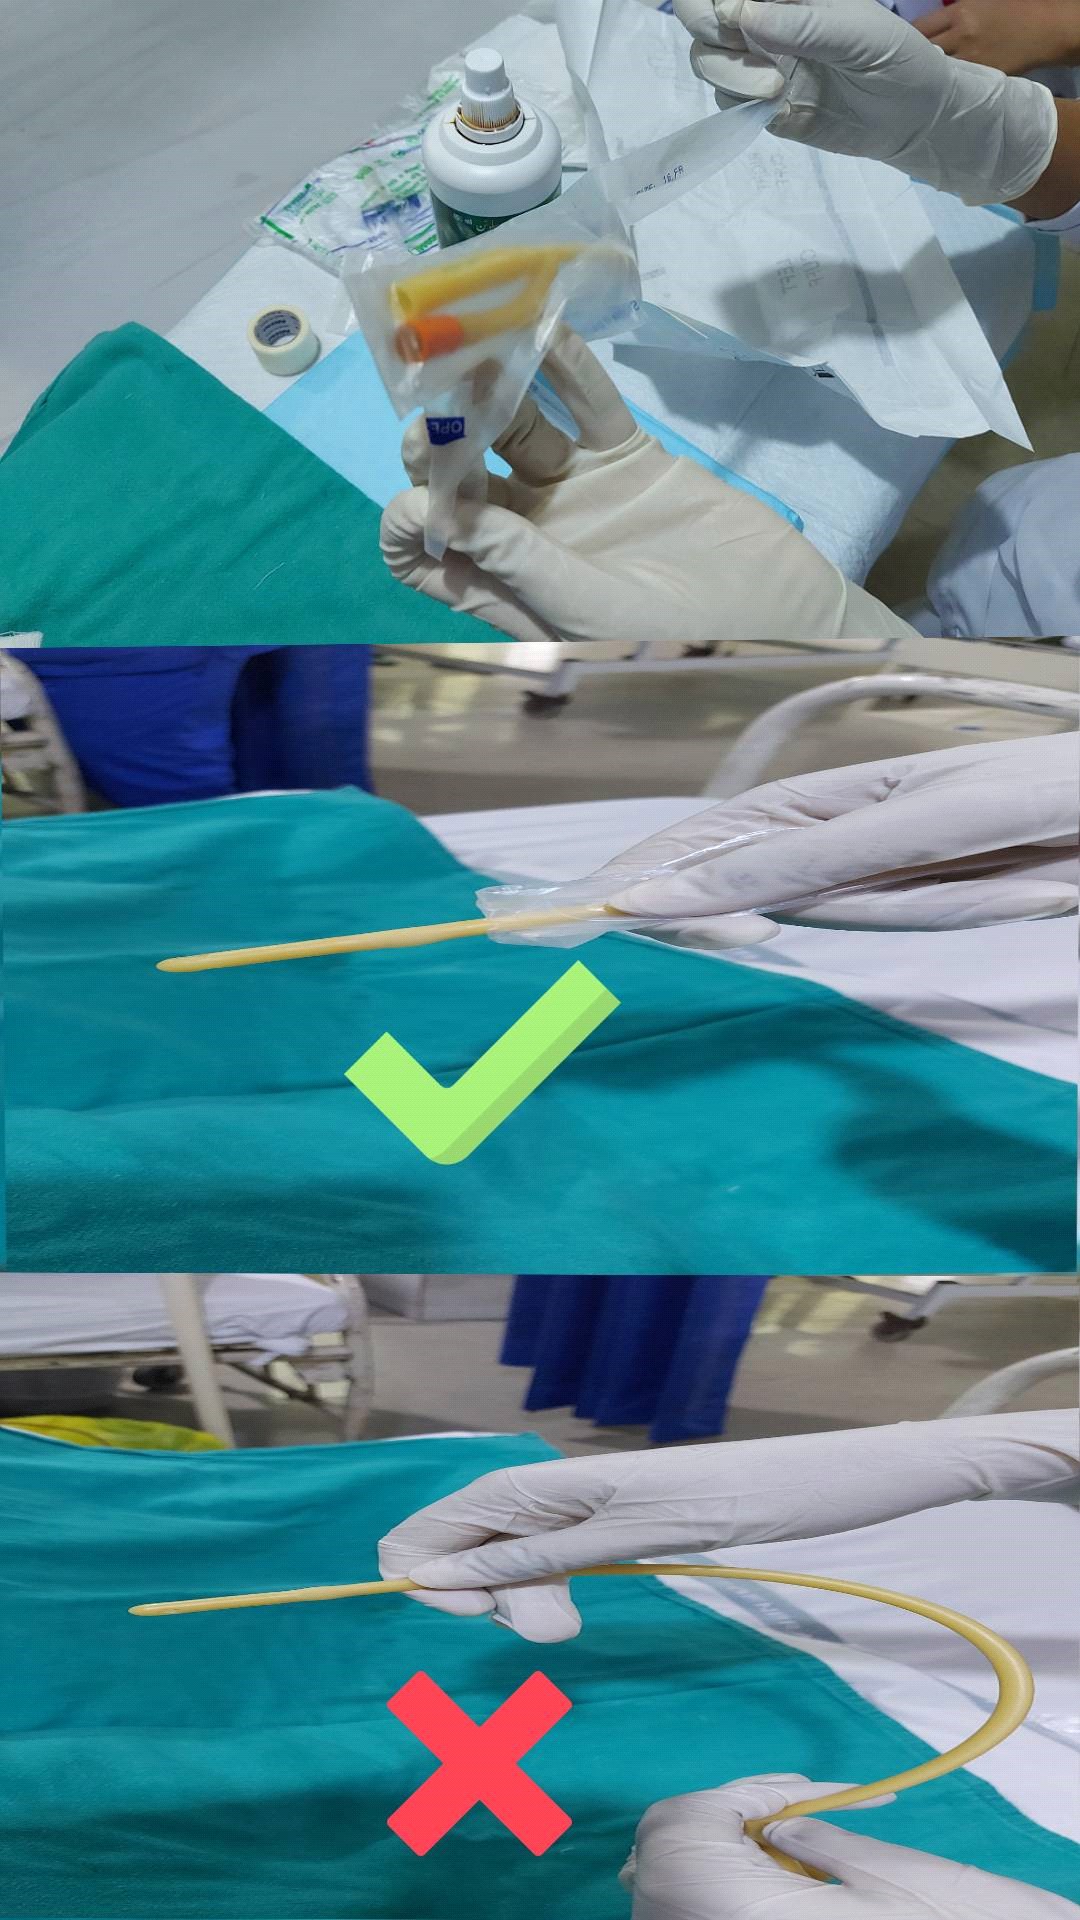
9. Tear the outer packing of the catheter. Carefully handling the catheter (the hand should
touch the inner plastic covering and not the surface of the catheter directly), lubricate
the catheter tip. Use sterile, single-use packet of lubricant jelly for catheter insertion.
10. Insert the catheter into the urinary meatus until the urine flows in the catheter (make
sure catheter is connected with collection bag).
11. Inflate the balloon of indwelling catheter with pre filled saline in the syringe.
12. Secure the Foley catheter.
13. Perform Hand Hygiene.
14. Position hanger on bed rail at the foot of the bed and confirm tube is not kinked.
15. Indicate time and date of catheter insertion.
16. Dispose of all waste properly.

Urinary Catheter Care
1. Following aseptic insertion of the urinary catheter, maintain a closed drainage
system.
2. Maintain unobstructed urine flow.
3. Insert catheters only for appropriate indications, and leave in place only as long as
needed.
4. Minimize urinary catheter use and duration of use in all patients, particularly those at
higher risk for CAUTI such as women, the elderly, and patients with impaired
immunity.
5. If breaks in aseptic technique, disconnection, or leakage occur, replace the catheter and
collecting system using aseptic technique and sterile equipment.
6. Do not clean the periurethral area with antiseptics to prevent CAUTI while the catheter is
in place. Routine hygiene (e.g., cleansing of the meatal surface during
daily bathing)
is appropriate.
7. Changing indwelling catheters or drainage bags at routine, fixed intervals is not
recommended. Rather, catheters and drainage bags should be changed based on
clinical
indications such as infection, obstruction, or when the closed system is compromised.
8. Use urinary catheters in operative patients only as necessary, rather than routinely. For
operative patients who have an indication for an indwelling catheter,
remove the
catheter as soon as possible postoperatively, preferably within 24 hours, unless there are
appropriate indications for continued use.
9. Consider using external catheters as an alternative to indwelling urethral catheters in
cooperative male patients without urinary retention or bladder outlet
obstruction.
10. screening of catheterized patients for asymptomatic bacteriuria is not
recommended.
Preparation
1. Identify patient and obtain consent for central venous catheter (CVC).
2. Use a CVC with the minimum number of ports or lumens essential for the management of the
patient.
3. When adherence to aseptic technique cannot be ensured (i.e., catheters inserted during a
medical emergency), replace the catheter as soon as possible, i.e., within 48
hours.
Select the best insertion site to minimize
infections and based on patient condition
1. Avoid femoral vein for CVC access in adult patients.
2. Use subclavian vein instead of jugular.
3. Avoid subclavian vein in hemodialysis patients and those with advanced kidney disease which
may cause subclavian vein stenosis.
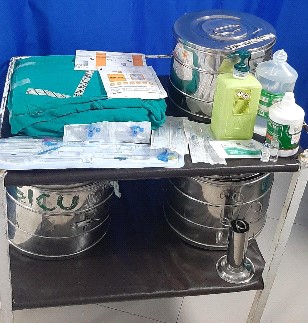
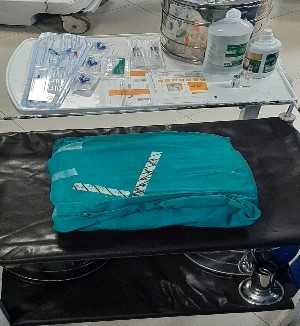
Gather all needed equipment
1. Sterilized CVC insertion pack set
2. PPE: Sterile gowns, cap and mask
3. Central Venous Catheter of an appropriate size.
4. Suture, syringes of 5cc and 10cc.
5. Injection Heparin, Xylocaine.
6. Sterile Gloves.
7. Pyodine solution, normal Saline.
Central Line Insertion Procedure
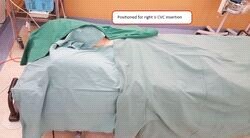
1. Remove wrist watch/Jewelry and rings.
2. Confirm hand washing/ sanitization with seven steps of hand Hygiene.
3. Operator: wear cap, mask, eye protection, sterile gown, sterile gloves.
4. Supervisor: wear cap, mask, eye protection, sterile gown, sterile gloves.
5. Assistance: wear cap, mask, eye protection, sterile gown, sterile gloves.
6. Patient’s proper position (Trendelenburg, supine).
7. Prepare clean skin with a >0.5% chlorhexidine preparation with alcohol bef. If there is a
contraindication to chlorhexidine or unavailability, tincture of iodine, an iodophor,
or 70% alcohol can be used as alternatives.
8. Allow site after antiseptic application to dry as per manufacturer’s
recommendation.
9. Use sterile technique to drape from head to toe.
10. Consider local anesthetic and / or sedation.
11. Ultrasonic guidance has to be observed aseptically.
12. Use new sterile gloves before handling the new catheter when guidewire exchanges are
performed.
During Procedure
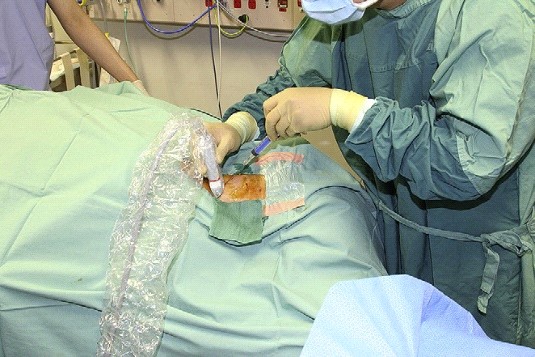
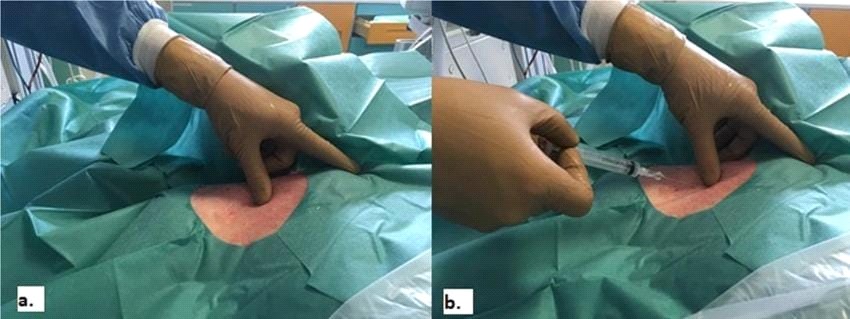
1. Maintain sterile field.
2. Clamps port not to be used during insertion.
3. Ensure grasp on guide wire is maintained throughout procedure and removed post
procedure.
4. Obtains qualified 2nd operator, after 3 unsuccessful pricks.
5. Aspirate blood from each lumen.
6. Transduce CVC/ ensure CVC by fluid volume.
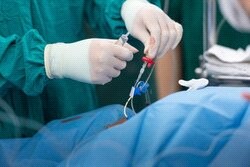
After Procedure
1. Clean blood from site.
2. Cover site with sterile guaze/ sterile transparent, semi-permeable dressing and label
it.
3. Verify placement by X-Ray.
4. Document procedure and fill the provided checklist of procedure.
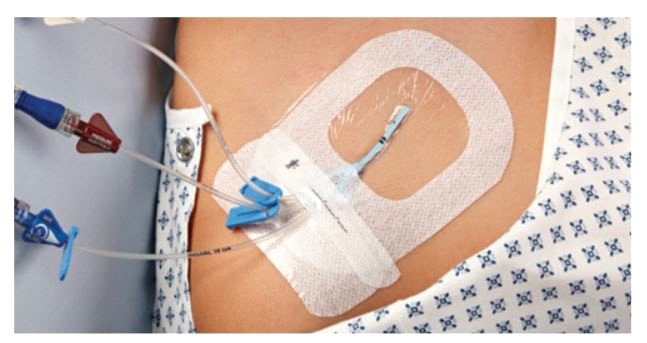
Catheter Site Dressing Regimens
1. Use either sterile gauze or sterile, transparent, semipermeable dressing to cover the
catheter site.
2. If the patient is diaphoretic or if the site is bleeding or oozing, use gauze
dressing until this is resolved.
3. Replace catheter site dressing if the dressing becomes damp, loosened, or visibly
soiled.
4. Do not use topical antibiotic ointment or creams on insertion sites, except for
dialysis catheters, because of their potential to promote fungal infections and
antimicrobial resistance.
5. Do not submerge the catheter or catheter site in water. Showering should be
permitted if precautions can be taken to reduce the likelihood of introducing organisms
into
the catheter (e.g., if the catheter and connecting device are protected with an
impermeable cover during the shower).
6. Replace dressings used on short-term CVC sites every 2 days for gauze dressings.
7. Replace dressings used on short-term CVC sites at least every 7 days for
transparent dressings, except in those pediatric patients in which the risk for dislodging
the
catheter may outweigh the benefit of changing the dressing.
8. Replace transparent dressings used on tunneled or implanted CVC sites no more than
once per week (unless the dressing is soiled or loose), until the insertion site
has
healed.
9. Monitor the catheter sites visually when changing the dressing or by palpation
through an intact dressing on a regular basis, depending on the clinical situation of
the
individual patient. If patients have tenderness at the insertion site, fever
without obvious source, or other manifestations suggesting local or bloodstream infection,
the
dressing should be removed to allow thorough examination of the site.
10. Clean skin with a >0.5% chlorhexidine preparation with alcohol during dressing
changes. If there is a contraindication to chlorhexidine, tincture of iodine, an iodophor,
or
70% alcohol can be used as alternatives.
11. Promptly remove any intravascular catheter that is no longer essential.
Replacement of CVCs, Including PICCs and Hemodialysis
Catheters
1. Do not routinely replace CVCs, PICCs, hemodialysis catheters, or pulmonary artery catheters
to prevent catheter-related infections.
2. Do not remove CVCs or PICCs on the basis of fever alone. Use clinical judgment
regarding the appropriateness of removing the catheter if infection is evidenced
elsewhere or if a noninfectious cause of fever is suspected.
3. Do not use guidewire exchanges routinely for non-tunneled catheters to prevent
infection.
4. Do not use guidewire exchanges to replace a non-tunneled catheter suspected of
infection.
5. Use a guidewire exchange to replace a malfunctioning non-tunneled catheter if no
evidence of infection is present.
6. Use new sterile gloves before handling the new catheter when guidewire exchanges
are performed.
Replacement of Administration Sets
1. In patients not receiving blood, blood products or fat emulsions, replace administration
sets that are continuously used, including secondary sets and add-on devices,
no more
frequently than at 96-hour intervals, but at least every 7 days.
2. Replace tubing used to administer blood, blood products, or fat emulsions (those
combined with amino acids and glucose in a 3-in-1 admixture or infused separately)
within 24 hours of initiating the infusion.
3. Replace tubing used to administer propofol infusions every 6 or 12 hours, when the
vial is changed, per the manufacturer’s recommendation.
CVC removal
1. Minimize Patient’s activity for at least one hour.
2. Check PT/INR within normal range.
3. Remove wrist watch/Jewelry and rings.
4. Confirm hand washing/ sanitization with seven steps of hand Hygiene.
5. Wear Gloves.
6. Remove Dressing.
7. Clean site with 2% Chlorhexidine/ 70 % Isopropyl or another available antiseptic
solution.
8. Remove Suture.
9. Remove Catheter by applying slight pressure on puncture site.
10. Manual pressure applied for at least 5 minutes above puncture site to occlude
blood.
11. Transparent dressing on puncture site.
12. Post removal assessment.
13. Remove gloves. Dispose all used equipment properly.
14. Confirm hand Hygiene.
15. Document procedure and fill provided checklist.
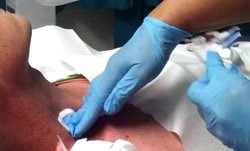

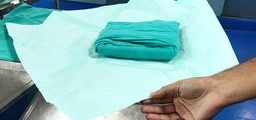
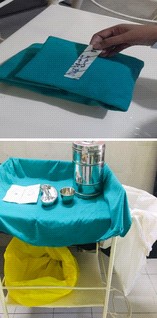
Before Use of Sterile Instrument Set, make sure of
the following
Outer condition of set is alright/Outer sheet is intact
1. External sterilization indicator (slanting lines on autoclave
tape should be black)
2. Packing / sterilization date
3. Expiry date
4. Batch no.
5. Set Department Name

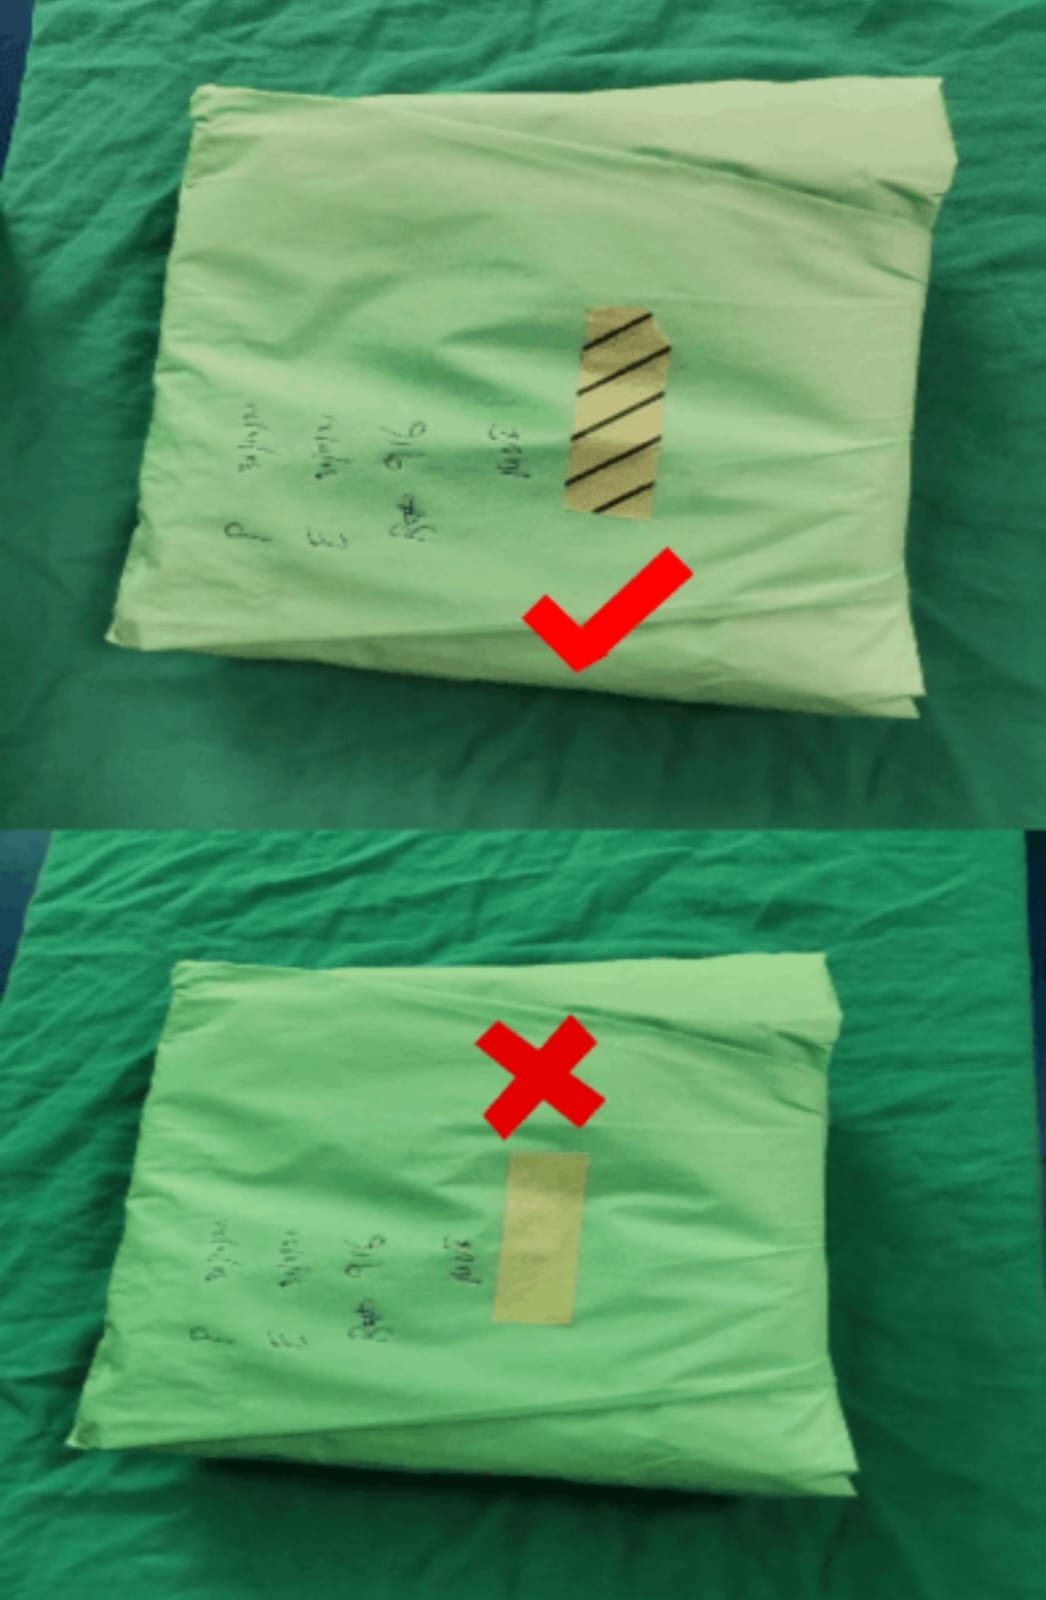
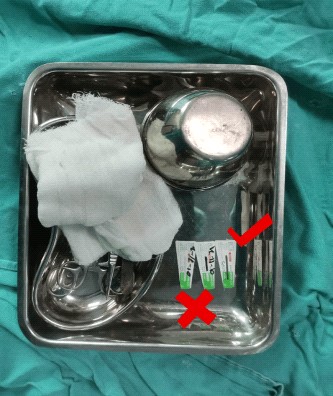
Check for internal sterilization indicator as per manufacturer instructions.(Currently in
LGH, in case of internal indicator as per manufacturer instructions
,whole line
should be turned black on sterigage.Half turned black or
white/unchnaged color is not acceptable.

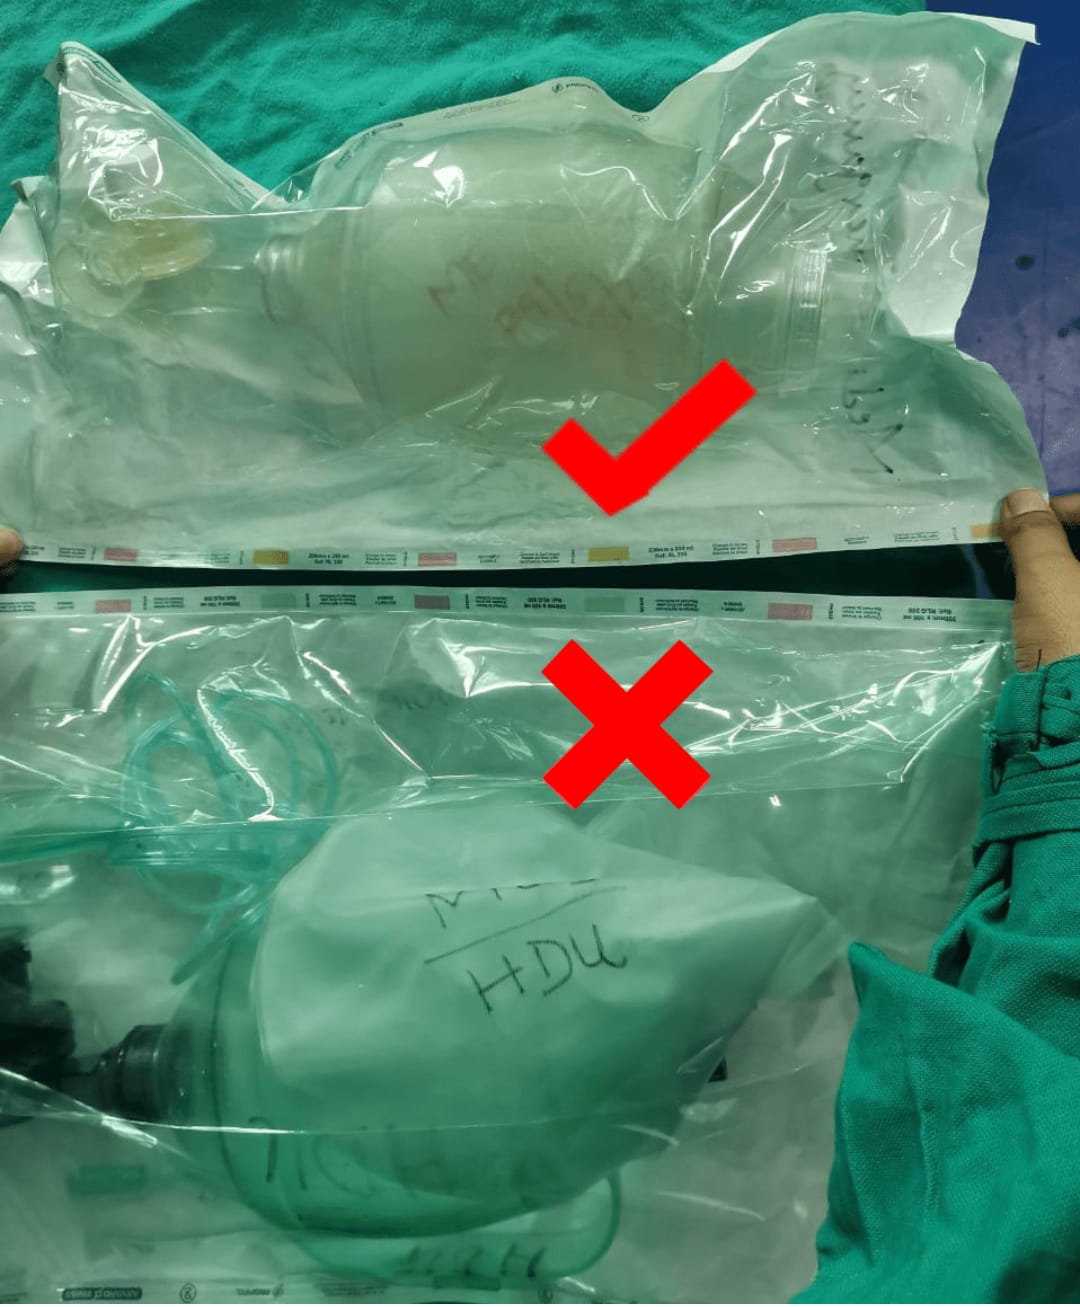
Check for indicator as per manufacturer’s instruction for low temperature sterilization
(Currently in LGH change of color on the paper packing for low temperature
sterilization
should be from pale to yellow).

Pre Operative
1. Preoperative bathing (with ordinary/antibacterial soap) is recommended.
2. Avoid hair removal; if hair removal is necessary, avoid the use of razors. Use clippers
instead.
3. The preop antibiotic should be administered within an hour of incision.
4. Patient normothermia and normal blood glucose level(for diabetics) should be maintained
throughout the surgery.
5. Identify and treat preoperative infections (eg UTI) be
Inter Operative
1. Cleaning and decontamination should be made sure of.
2. Control the traffic.
3. Doors should be closed all the time during operation.
4. Proper ventilation should be maintained throughout the surgery. Positive pressure should
be maintained (min of 15 air
exchanges per hour,3of which must be of
fresh air). Filtering of air should be
through two filters
that provide 90% efficacy. Air should be introduced near ceiling and exits near
floor.
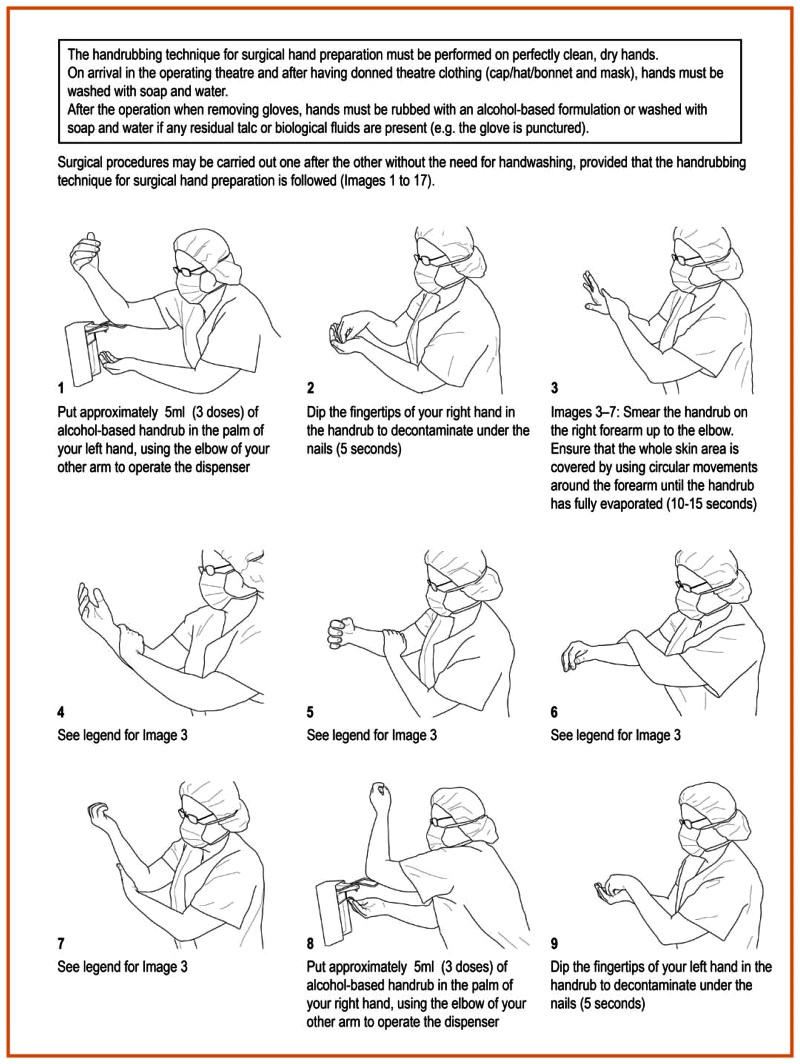
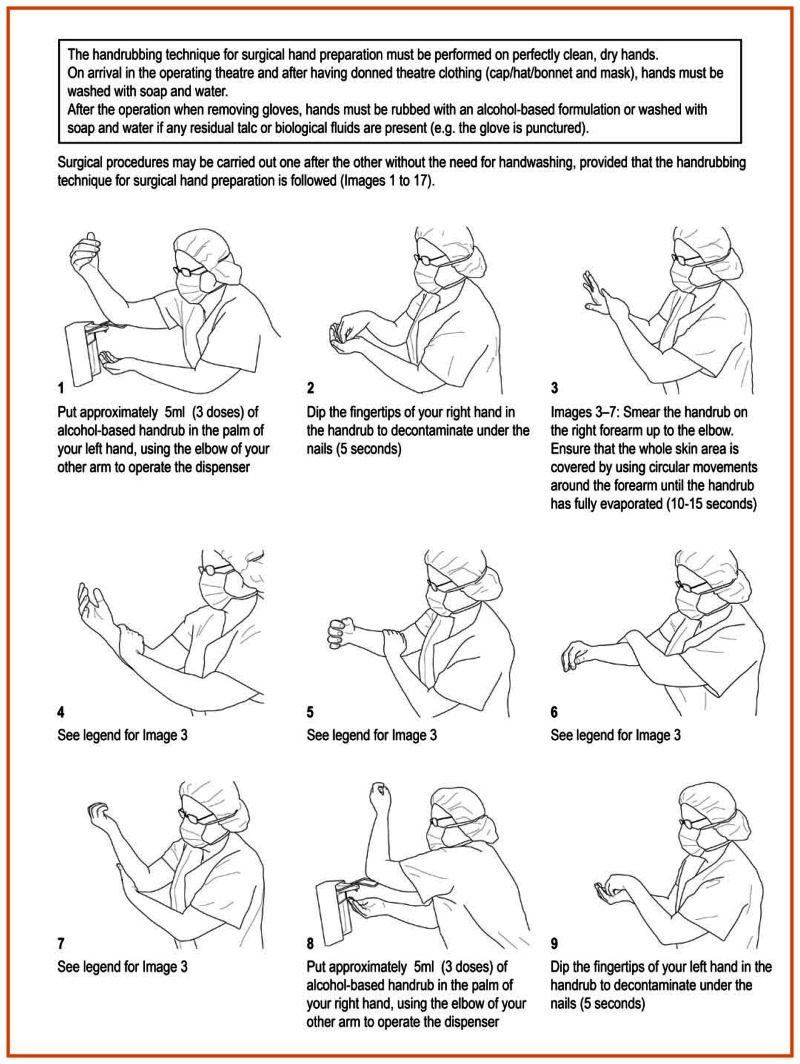
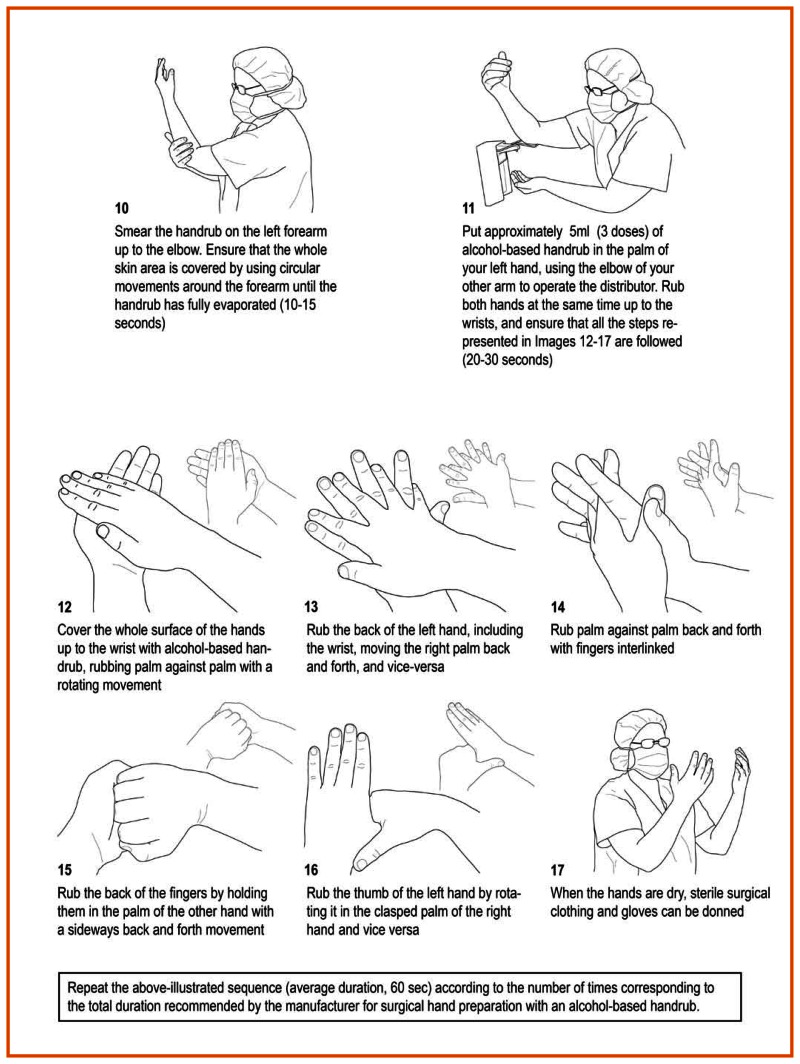
5. Properly perform surgical hand scrub/rub. Don appropriate PPE.
6. Perform skin preparation of patient’s skin properly.
7. Patient should be covered with a drape.
8. Drape should separate surgical instruments, equipment and supplies.
9. Surgical instruments should be properly sterilized.
Outer condition of set is alright/Outer sheet is intact
1. External sterilization indicator (slanting lines on autoclave
tape should be black)
2. Packing / sterilization date
3. Expiry date
4. Batch no.
5. Set Department Name


Check for internal sterilization indicator as per manufacturer instructions.(Currently
in LGH, in case of internal indicator as per manufacturer instructions
,whole line
should be turned black on sterigage.Half turned black or
white/unchnaged color is not acceptable.


Check for indicator as per manufacturer’s instruction for low temperature sterilization
(Currently in LGH change of color on the paper packing for low temperature
sterilization
should be from pale to yellow).


Inter Operative
1. Surgical dressing should be done aseptically by non-touch technique.
2. Protect primary closure incisions with sterile dressing for 24 for 48 hours.
3. Maintain immediate post-op normothermia.
4. Control blood glucose levels (in diabetic pts) post operatively.
5. Observe five moments of hand Hygiene.
6. Educate patient about surgical site infection.
Assemble equipment (tourniquet, gloves, alcohol swabs, Cannula, 3 way extension,
syringes, sharp box). 


1. Perform hand hygiene (if using soap and water, dry hands with single use towel).
2. Identify and prepare the patient.
3. Select the site.
4. Apply a tourniquet, about 4–5 finger widths above the selected venepuncture
site.
5. Ask the patient to form a fist so that the veins are more prominent.
6. Perfrom hand hygiene. Put on well-fitting, non-sterile gloves.


7. Disinfect the site using 70% isopropyl alcohol for 30 seconds with friction in a back and
forth direction.
8. Allow to dry completely (30 seconds). DONOT touch the puncture site after applying
antiseptic.
9. Anchor the vein by holding the patient’s arm/hand and placing a thumb BELOW the
venepuncture site.
10. Enter the IV catheter swiftly at a 30 degree angle.
11. Once sufficient blood has been seen coming in the catheter, release the
tourniquet.
12. Withdraw the needle gently and then secure the catheter with a transparent/ gauze
dressing


13. Discard the used needle into a puncture-resistant container.
14. Remove gloves, discard properly and perform hand hygiene. If using soap and water, dry
hands with single-use towels.
15. Enter the record with date.


IV Catheter/Cannula Care
1. In adults, use an upper-extremity site for catheter insertion. Replace a catheter inserted
in a lower extremity site to an upper extremity site as soon as possible.
2. In pediatric patients, the upper or lower extremities or the scalp (in neonates or young
infants) can be used as the catheter insertion site.
3. Replace peripheral catheters after 72-96 hours.
4. Use a midline catheter or peripherally inserted central catheter (PICC), instead of a short
peripheral catheter, when the duration of IV therapy will likely exceed six
days.
5. Any dressing that becomes soiled, wet, damaged, is no longer adherent, has visible
ooze under it or starts to lift should be changed immediately.
6. Evaluate the catheter insertion site daily by palpation through the dressing to
discern tenderness and by inspection if a transparent dressing is in use. Gauze and
opaque dressings should not be removed if the patient has no clinical signs of
infection.
If the patient has local tenderness or other signs of possible infection ,
opaque dressing should be removed to visualize clearly.
7. Topical antibiotic ointments or creams should not be routinely used on insertion
sites.
Urinary Catheter Insertion
1.Confirm patient meets the appropriate indications for Indwelling Urethral Catheter.
2.Gather the equipment.


3. Perform hand hygiene.
4. Position the patient properly.
4a. Female
Supine position with knees flexed and separated; feet flat on the bed.
4b. Male
Supine position with legs extended.
5. Open the package and create an area for the sterile field.
6. Drape the patient with sterile sheets supplied in the kit.
7. Perform hand hygiene and wear sterile gloves.
8. Cleanse the perineal area with pyodine solution.
9. Tear the outer packing of the catheter. Carefully handling the catheter (the hand should
touch the inner plastic covering and not the surface of the catheter directly), lubricate
the catheter tip. Use sterile, single-use packet of lubricant jelly for catheter insertion.
10. Insert the catheter into the urinary meatus until the urine flows in the catheter (make
sure catheter is connected with collection bag).
11. Inflate the balloon of indwelling catheter with pre filled saline in the syringe.
12. Secure the Foley catheter.
13. Perform Hand Hygiene.
14. Position hanger on bed rail at the foot of the bed and confirm tube is not kinked.
15. Indicate time and date of catheter insertion.
16. Dispose of all waste properly.


Urinary Catheter Care
1. Following aseptic insertion of the urinary catheter, maintain a closed drainage
system.
2. Maintain unobstructed urine flow.
3. Insert catheters only for appropriate indications, and leave in place only as long as
needed.
4. Minimize urinary catheter use and duration of use in all patients, particularly those at
higher risk for CAUTI such as women, the elderly, and patients with impaired
immunity.
5. If breaks in aseptic technique, disconnection, or leakage occur, replace the catheter and
collecting system using aseptic technique and sterile equipment.
6. Do not clean the periurethral area with antiseptics to prevent CAUTI while the catheter is
in place. Routine hygiene (e.g., cleansing of the meatal surface during
daily bathing)
is appropriate.
7. Changing indwelling catheters or drainage bags at routine, fixed intervals is not
recommended. Rather, catheters and drainage bags should be changed based on
clinical
indications such as infection, obstruction, or when the closed system is compromised.
8. Use urinary catheters in operative patients only as necessary, rather than routinely. For
operative patients who have an indication for an indwelling catheter,
remove the
catheter as soon as possible postoperatively, preferably within 24 hours, unless there are
appropriate indications for continued use.
9. Consider using external catheters as an alternative to indwelling urethral catheters in
cooperative male patients without urinary retention or bladder outlet
obstruction.
10. screening of catheterized patients for asymptomatic bacteriuria is not
recommended.
Preparation
1. Identify patient and obtain consent for central venous catheter (CVC).
2. Use a CVC with the minimum number of ports or lumens essential for the management of the
patient.
3. When adherence to aseptic technique cannot be ensured (i.e., catheters inserted during a
medical emergency), replace the catheter as soon as possible, i.e., within 48
hours.
Select the best insertion site to minimize
infections and based on patient condition
1. Avoid femoral vein for CVC access in adult patients.
2. Use subclavian vein instead of jugular.
3. Avoid subclavian vein in hemodialysis patients and those with advanced kidney disease which
may cause subclavian vein stenosis.
Gather all needed equipment
1. Sterilized CVC insertion pack set
2. PPE: Sterile gowns, cap and mask
3. Central Venous Catheter of an appropriate size.
4. Suture, syringes of 5cc and 10cc.
5. Injection Heparin, Xylocaine.
6. Sterile Gloves.
7. Pyodine solution, normal Saline.


Central Line Insertion Procedure
1. Remove wrist watch/Jewelry and rings.
2. Confirm hand washing/ sanitization with seven steps of hand Hygiene.
3. Operator: wear cap, mask, eye protection, sterile gown, sterile gloves.
4. Supervisor: wear cap, mask, eye protection, sterile gown, sterile gloves.
5. Assistance: wear cap, mask, eye protection, sterile gown, sterile gloves.
6. Patient’s proper position (Trendelenburg, supine).
7. Prepare clean skin with a >0.5% chlorhexidine preparation with alcohol bef. If there is a
contraindication to chlorhexidine or unavailability, tincture of iodine, an iodophor,
or 70% alcohol can be used as alternatives.
8. Allow site after antiseptic application to dry as per manufacturer’s
recommendation.
9. Use sterile technique to drape from head to toe.
10. Consider local anesthetic and / or sedation.
11. Ultrasonic guidance has to be observed aseptically.
12. Use new sterile gloves before handling the new catheter when guidewire exchanges are
performed.


During Procedure
1. Maintain sterile field.
2. Clamps port not to be used during insertion.
3. Ensure grasp on guide wire is maintained throughout procedure and removed post
procedure.
4. Obtains qualified 2nd operator, after 3 unsuccessful pricks.
5. Aspirate blood from each lumen.
6. Transduce CVC/ ensure CVC by fluid volume.


After Procedure
1. Clean blood from site.
2. Cover site with sterile guaze/ sterile transparent, semi-permeable dressing and label
it.
3. Verify placement by X-Ray.
4. Document procedure and fill the provided checklist of procedure.

Select the best insertion site to minimize infections and based on patient condition
Gather all needed equipment


Central Line Insertion Procedure


During Procedure


After Procedure

Catheter Site Dressing Regimens
1. Use either sterile gauze or sterile, transparent, semipermeable dressing to cover the
catheter site.
2. If the patient is diaphoretic or if the site is bleeding or oozing, use gauze
dressing until this is resolved.
3. Replace catheter site dressing if the dressing becomes damp, loosened, or visibly
soiled.
4. Do not use topical antibiotic ointment or creams on insertion sites, except for
dialysis catheters, because of their potential to promote fungal infections and
antimicrobial resistance.
5. Do not submerge the catheter or catheter site in water. Showering should be
permitted if precautions can be taken to reduce the likelihood of introducing organisms
into
the catheter (e.g., if the catheter and connecting device are protected with an
impermeable cover during the shower).
6. Replace dressings used on short-term CVC sites every 2 days for gauze dressings.
7. Replace dressings used on short-term CVC sites at least every 7 days for
transparent dressings, except in those pediatric patients in which the risk for dislodging
the
catheter may outweigh the benefit of changing the dressing.
8. Replace transparent dressings used on tunneled or implanted CVC sites no more than
once per week (unless the dressing is soiled or loose), until the insertion site
has
healed.
9. Monitor the catheter sites visually when changing the dressing or by palpation
through an intact dressing on a regular basis, depending on the clinical situation of
the
individual patient. If patients have tenderness at the insertion site, fever
without obvious source, or other manifestations suggesting local or bloodstream infection,
the
dressing should be removed to allow thorough examination of the site.
10. Clean skin with a >0.5% chlorhexidine preparation with alcohol during dressing
changes. If there is a contraindication to chlorhexidine, tincture of iodine, an iodophor,
or
70% alcohol can be used as alternatives.
11. Promptly remove any intravascular catheter that is no longer essential.
Replacement of CVCs, Including PICCs and Hemodialysis Catheters
1. Do not routinely replace CVCs, PICCs, hemodialysis catheters, or pulmonary artery catheters
to prevent catheter-related infections.
2. Do not remove CVCs or PICCs on the basis of fever alone. Use clinical judgment
regarding the appropriateness of removing the catheter if infection is evidenced
elsewhere or if a noninfectious cause of fever is suspected.
3. Do not use guidewire exchanges routinely for non-tunneled catheters to prevent
infection.
4. Do not use guidewire exchanges to replace a non-tunneled catheter suspected of
infection.
5. Use a guidewire exchange to replace a malfunctioning non-tunneled catheter if no
evidence of infection is present.
6. Use new sterile gloves before handling the new catheter when guidewire exchanges
are performed.
Replacement of Administration Sets
1. In patients not receiving blood, blood products or fat emulsions, replace administration
sets that are continuously used, including secondary sets and add-on devices,
no more
frequently than at 96-hour intervals, but at least every 7 days.
2. Replace tubing used to administer blood, blood products, or fat emulsions (those
combined with amino acids and glucose in a 3-in-1 admixture or infused separately)
within 24 hours of initiating the infusion.
3. Replace tubing used to administer propofol infusions every 6 or 12 hours, when the
vial is changed, per the manufacturer’s recommendation.
CVC removal
1. Minimize Patient’s activity for at least one hour.
2. Check PT/INR within normal range.
3. Remove wrist watch/Jewelry and rings.
4. Confirm hand washing/ sanitization with seven steps of hand Hygiene.
5. Wear Gloves.
6. Remove Dressing.
7. Clean site with 2% Chlorhexidine/ 70 % Isopropyl or another available antiseptic
solution.
8. Remove Suture.
9. Remove Catheter by applying slight pressure on puncture site.
10. Manual pressure applied for at least 5 minutes above puncture site to occlude
blood.
11. Transparent dressing on puncture site.
12. Post removal assessment.
13. Remove gloves. Dispose all used equipment properly.
14. Confirm hand Hygiene.
15. Document procedure and fill provided checklist.


Before Use of Sterile Instrument Set, make sure of the following
Outer condition of set is alright/Outer sheet is intact
1. External sterilization indicator (slanting lines on autoclave
tape should be black)
2. Packing / sterilization date
3. Expiry date
4. Batch no.
5. Set Department Name


Check for internal sterilization indicator as per manufacturer instructions.(Currently in
LGH, in case of internal indicator as per manufacturer instructions
,whole line
should be turned black on sterigage.Half turned black or
white/unchnaged color is not acceptable.


Check for indicator as per manufacturer’s instruction for low temperature sterilization
(Currently in LGH change of color on the paper packing for low temperature
sterilization
should be from pale to yellow).


Pre Operative
1. Preoperative bathing (with ordinary/antibacterial soap) is recommended.
2. Avoid hair removal; if hair removal is necessary, avoid the use of razors. Use clippers
instead.
3. The preop antibiotic should be administered within an hour of incision.
4. Patient normothermia and normal blood glucose level(for diabetics) should be maintained
throughout the surgery.
5. Identify and treat preoperative infections (eg UTI) be
Inter Operative
1. Cleaning and decontamination should be made sure of.
2. Control the traffic.
3. Doors should be closed all the time during operation.
4. Proper ventilation should be maintained throughout the surgery. Positive pressure should
be maintained (min of 15 air
exchanges per hour,3of which must be of
fresh air). Filtering of air should be
through two filters
that provide 90% efficacy. Air should be introduced near ceiling and exits near
floor.
5. Properly perform surgical hand scrub/rub. Don appropriate PPE.
6. Perform skin preparation of patient’s skin properly.
7. Patient should be covered with a drape.
8. Drape should separate surgical instruments, equipment and supplies.
9. Surgical instruments should be properly sterilized.
Outer condition of set is alright/Outer sheet is intact
1. External sterilization indicator (slanting lines on autoclave
tape should be black)
2. Packing / sterilization date
3. Expiry date
4. Batch no.
5. Set Department Name


Check for internal sterilization indicator as per manufacturer instructions.(Currently
in LGH, in case of internal indicator as per manufacturer instructions
,whole line
should be turned black on sterigage.Half turned black or
white/unchnaged color is not acceptable.


Check for indicator as per manufacturer’s instruction for low temperature sterilization
(Currently in LGH change of color on the paper packing for low temperature
sterilization
should be from pale to yellow).


